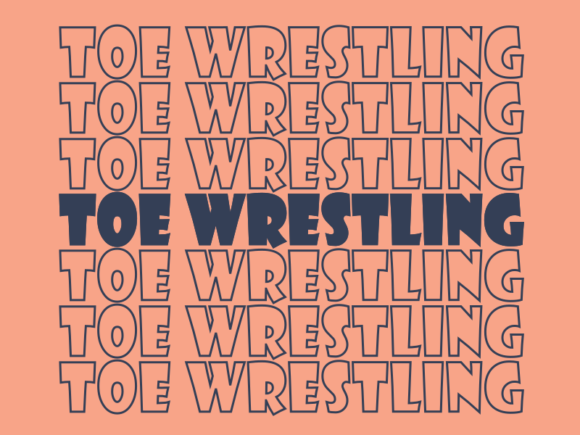
Toe Wrestling SVG Cut File
If you’ve ever searched for quirky, conversation-starting designs to cut, layer, or print—especially for themed parties, classroom fun, or novelty merchandise—you’ve likely stumbled across a Toe Wrestling SVG Cut File. It’s not just a playful graphic; it’s a precision-engineered vector file built for real-world crafting. Unlike raster images (like JPGs or PNGs), this Scalable Vector Graphic retains crisp edges at any size—whether you’re cutting a 2-inch sticker for a kids’ activity sheet or scaling it to 24 inches for a bold wall decal.
Why This Isn’t Just Another “Fun” Design—It’s a Functional Asset
SVG stands for Scalable Vector Graphics—and that “scalable” part matters more than most beginners realize. A Toe Wrestling SVG Cut File isn’t meant to sit in a folder and gather dust. It’s built to be *used*: imported into Silhouette Studio, Cricut Design Space, or Inkscape; adjusted for material thickness; recolored to match your brand palette; and sent straight to your machine. Because it’s vector-based, there’s no risk of blurriness—even when stretched across a 36" banner or shrunk down for a charm-sized leather tag.
That versatility opens doors far beyond paper crafts. You can apply the same Toe Wrestling SVG Cut File to vinyl for car decals, heat-transfer vinyl for t-shirts, adhesive-backed felt for classroom manipulatives, or even thin leather for custom keychains. The only real limit is your machine’s compatibility—not the file itself.
Common Missteps—and How to Avoid Them
Even experienced crafters sometimes overlook small but critical details when working with a Toe Wrestling SVG Cut File. Here’s what trips people up—and how to sidestep those pitfalls:
Mistake #1: Assuming All SVG Files Are Machine-Ready Out of the Box
Not every SVG labeled “for Cricut” or “Silhouette compatible” actually is. Some files contain embedded raster elements, ungrouped layers, or non-cuttable text outlines that won’t process correctly. Others use RGB-only color profiles that don’t translate cleanly to vinyl or print workflows.
Better approach: Before downloading or purchasing, open the preview image and check for visible pixelation or fuzzy edges. Then, verify the product description mentions “clean vector paths,” “no embedded bitmaps,” and “tested in Cricut Design Space v7+ or Silhouette Studio 5.0+.” If possible, download a free sample version first—or look for shops that offer a quick support reply when you ask, “Is this file pre-grouped and weld-ready?”
Mistake #2: Ignoring Material-Specific Settings
A Toe Wrestling SVG Cut File works beautifully on 651 vinyl—but if you try to cut it from thick balsa wood using default settings, your blade may skip, gouge, or stall entirely. Similarly, felt requires slower speeds and deeper passes than cardstock, and cotton fabric often needs stabilizer and reduced pressure.
Better approach: Always consult your machine’s official material guide *first*, then adjust the cut settings accordingly. For example: reduce speed by 20–30% and increase blade depth by one notch when moving from paper to medium-weight leather. Keep a simple reference sheet taped near your machine listing common materials and their ideal force/speed/blade combinations.
Mistake #3: Overlooking Color Customization Limits
Many users assume they can change colors freely—but some SVG files lock fills or use layered clipping masks that resist standard recolor tools. Others include dozens of individual objects with mismatched stroke/fill assignments, making batch edits time-consuming and error-prone.
Better approach: Choose files explicitly labeled “fully editable colors” or “layered with named groups.” In design software, use the Layers panel to isolate and rename sections (e.g., “Toe Outline,” “Shoe Detail,” “Text Banner”) so future edits are intuitive—not frustrating.
Mistake #4: Skipping the Test Cut—Especially on New Materials
Even with perfect settings, subtle variations in material thickness, temperature, or humidity can affect cut accuracy. Jumping straight into a full project without testing risks wasting expensive vinyl, leather, or specialty fabrics.
Better approach: Always run a 1.5" test cut of a single toe or shoe element before loading your full mat. Use scrap material from the same batch—same roll, same side—if possible. Check for clean separation, no uncut bridges, and consistent line width. Adjust one setting at a time (e.g., blade depth only) until you get clean results.
What to Check Before You Download or Buy
- File structure: Does the ZIP include both SVG and DXF versions? DXF ensures broader compatibility with older or non-Cricut/Silhouette machines.
- Licensing clarity: Is personal use included? What about small business use (e.g., selling 50 handmade toe-wrestling-themed bookmarks)? Reputable sellers specify commercial terms upfront—don’t assume “personal use only” covers Etsy resales.
- Design integrity: Are outlines smooth and closed? Open paths won’t cut properly. Zoom in on preview thumbnails—look for jagged corners or stray anchor points.
- Support responsiveness: A quick reply to a pre-purchase question (“Does this include shadow layers?” or “Can I remove the text easily?”) signals reliability—not just marketing.
Real Projects, Real Results
Teachers have used the Toe Wrestling SVG Cut File to create interactive floor mats for physical education units—cut from non-slip rubberized vinyl and laminated for durability. Small-batch apparel makers applied it to organic cotton tote bags using iron-on HTV, pairing it with witty slogans like “I Came to Wrestle Toes—and I Brought Snacks.” Event planners printed it onto kraft paper banners for summer picnics, then added twine hangers and chalkboard-style fonts for instant charm.
None of those successes relied on luck. They came from choosing a clean, well-structured Toe Wrestling SVG Cut File—and treating it as a tool, not decoration.
Final Thought: Start Simple, Scale Smart
You don’t need every feature to begin. A solid Toe Wrestling SVG Cut File with clean lines, editable colors, and clear licensing gives you room to grow—from first-time Cricut users to educators building curriculum kits or entrepreneurs launching themed product lines. Focus less on “how many layers” and more on “how reliably does it cut?” Less on “how many formats” and more on “does it work where I need it to?” That’s how good design becomes great execution.